
Integration with PayPal

Let’s create a website with several goods for sale using PayPal.

1. Create a project in Quarkly#

Create an empty project.

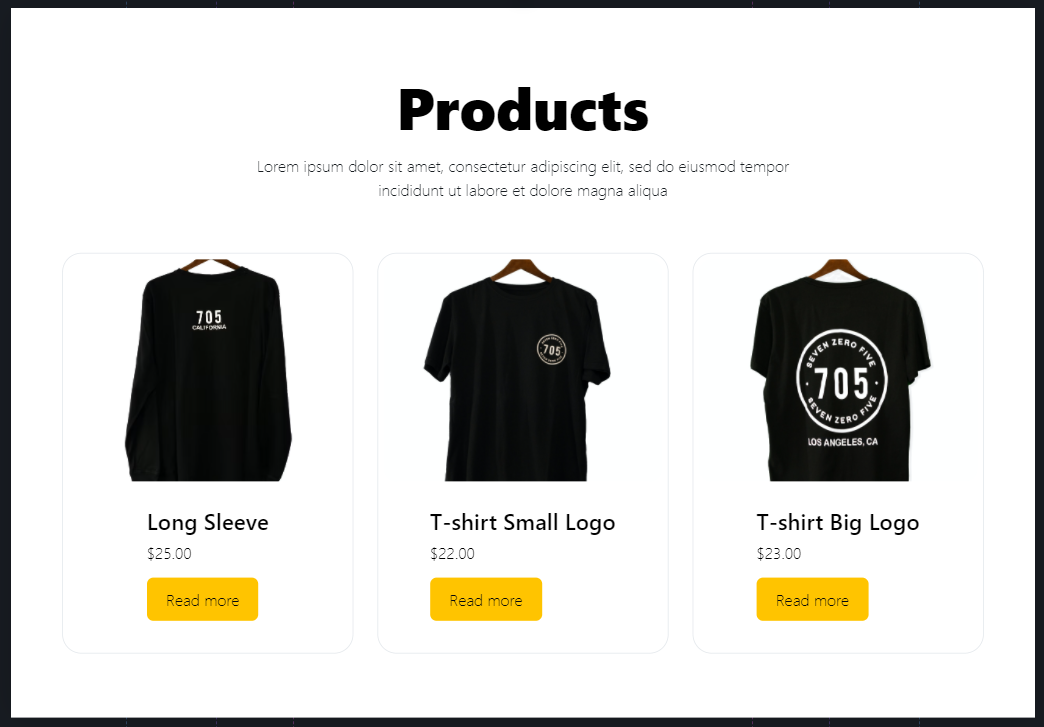
1.1 Create the main page#

Copy the below code and paste it into the page.

<Section padding="80px 0 80px 0">
<Override slot="SectionContent" flex-direction="row" flex-wrap="wrap" />
<Box
display="flex"
align-items="center"
flex-direction="column"
justify-content="center"
margin="0px 0px 64px 0px"
width="100%"
sm-margin="0px 0px 30px 0px"
padding="0px 200px 0px 200px"
lg-padding="0px 0px 0px 0px"
>
<Text margin="0px 0px 16px 0px" font="--headline1" text-align="center" sm-font="normal 700 42px/1.2 &quot;Source Sans Pro&quot;, sans-serif">
Products
</Text>
<Text margin="0px 0px 0px 0px" color="--darkL2" text-align="center" font="--lead">
Lorem ipsum dolor sit amet, consectetur adipiscing elit, sed do eiusmod tempor incididunt ut labore et dolore magna aliqua
</Text>
</Box>
<Box
display="grid"
flex-wrap="wrap"
width="100%"
align-items="center"
justify-content="center"
grid-template-columns="repeat(3, 1fr)"
grid-gap="30px"
md-grid-template-columns="1fr"
>
<Box
width="100%"
display="flex"
padding="7px 7px 40px 7px"
border-radius="24px"
align-items="center"
flex-direction="column"
border-width="1px"
border-style="solid"
border-color="--color-lightD2"
justify-content="center"
>
<Image
src="https://images.unsplash.com/photo-1618354691229-88d47f285158?ixlib=rb-1.2.1&ixid=MnwxMjA3fDB8MHxwaG90by1wYWdlfHx8fGVufDB8fHx8&auto=format&fit=crop&w=715&q=80"
border-radius="16px"
margin="0px 0px 32px 0px"
max-width="100%"
md-width="100%"
width="100%"
height="278px"
object-fit="cover"
/>
<Box
display="flex"
flex-direction="column"
padding="0px 30px 0px 30px"
align-items="flex-start"
justify-content="flex-start"
>
<Text margin="0px 0px 8px 0px" font="--headline3">
Long Sleeve
</Text>
<Text margin="0px 0px 16px 0px" text-align="center" font="--lead">
$25.00
</Text>
<Link
href="/long-sleeve#"
text-decoration-line="initial"
color="--dark"
font="--lead"
padding="12px 24px 12px 24px"
border-radius="8px"
background="--color-secondary"
lg-padding="12px 20px 12px 20px"
transition="background-color 0.2s ease-in-out 0s"
hover-transition="background-color 0.2s ease-in-out 0s"
hover-background="--color-orange"
>
Read more
</Link>
</Box>
</Box>
<Box
width="100%"
display="flex"
padding="7px 7px 40px 7px"
border-radius="24px"
align-items="center"
flex-direction="column"
border-width="1px"
border-style="solid"
border-color="--color-lightD2"
justify-content="center"
position="relative"
>
<Image
src="https://images.unsplash.com/photo-1618354691373-d851c5c3a990?ixlib=rb-1.2.1&q=85&fm=jpg&crop=entropy&cs=srgb&h=2000"
border-radius="16px"
max-width="100%"
md-width="100%"
max-height="278px"
object-fit="cover"
width="100%"
margin="0px 0px 32px 0px"
/>
<Box
display="flex"
flex-direction="column"
padding="0px 30px 0px 30px"
align-items="flex-start"
justify-content="flex-start"
>
<Text margin="0px 0px 8px 0px" font="--headline3">
T-shirt Small Logo
</Text>
<Text margin="0px 0px 16px 0px" text-align="center" font="--lead">
$22.00
</Text>
<Link
href="/t-shirt-small-logo#"
text-decoration-line="initial"
color="--dark"
font="--lead"
padding="12px 24px 12px 24px"
border-radius="8px"
background="--color-secondary"
lg-padding="12px 20px 12px 20px"
transition="background-color 0.2s ease-in-out 0s"
hover-transition="background-color 0.2s ease-in-out 0s"
hover-background="--color-orange"
>
Read more
</Link>
</Box>
</Box>
<Box
width="100%"
display="flex"
padding="7px 7px 40px 7px"
border-radius="24px"
align-items="center"
flex-direction="column"
border-width="1px"
border-style="solid"
border-color="--color-lightD2"
justify-content="center"
>
<Image
src="https://images.unsplash.com/photo-1618354691438-25bc04584c23?ixlib=rb-1.2.1&q=85&fm=jpg&crop=entropy&cs=srgb&h=2000"
border-radius="16px"
margin="0px 0px 32px 0px"
max-width="100%"
md-width="100%"
max-height="278px"
object-fit="cover"
width="100%"
/>
<Box
display="flex"
flex-direction="column"
padding="0px 30px 0px 30px"
align-items="flex-start"
justify-content="flex-start"
>
<Text margin="0px 0px 8px 0px" font="--headline3">
T-shirt Big Logo
</Text>
<Text margin="0px 0px 16px 0px" text-align="center" font="--lead">
$23.00
</Text>
<Link
href="/t-shirt-big-logo#"
text-decoration-line="initial"
color="--dark"
font="--lead"
padding="12px 24px 12px 24px"
border-radius="8px"
background="--color-secondary"
lg-padding="12px 20px 12px 20px"
transition="background-color 0.2s ease-in-out 0s"
hover-transition="background-color 0.2s ease-in-out 0s"
hover-background="--color-orange"
>
Read more
</Link>
</Box>
</Box>
</Box>
</Section>

Here is the result you should get:

Site preview

1.2 Create the PayPal payment component#

Create a component named QuarklyPayPal.

import React from 'react';
import atomize from "@quarkly/atomize";
import { Box } from "@quarkly/widgets"
import { PayPalButton } from "react-paypal-button-v2";
const QuarklyPaypalButton = ({ clientId, price, itemName, currencyCode, itemDescription, ...props }) => {
return <Box {...props}>
<PayPalButton
currency={currencyCode}
// onSuccess is called in case of a successful transaction
// Here you can send a request to save the transaction
onSuccess={(details, data) => {
const transactionId = details.purchase_units[0].payments.captures[0].id;
alert(`Transaction completed by ${details.payer.name.given_name}\nYour transaction id: ${transactionId}`);
}}
// More details about createOrder:
// https://developer.paypal.com/sdk/js/reference/#createorder
createOrder={(data, actions) => {
return actions.order.create({
purchase_units: [{
amount: {
currency_code: currencyCode,
value: price,
breakdown: {
item_total: {
currency_code: currencyCode,
value: price
}
}
},
items: [{
name: itemName,
description: itemDescription,
unit_amount: {
currency_code: currencyCode,
value: price
},
quantity: "1"
}]
}]
});
}}
style={{
label: 'buynow'
}}
options={{
clientId,
currency: currencyCode,
}}
/>
</Box>
}
export default atomize(QuarklyPaypalButton)({
name: "QuarklyPaypalButton",
effects: {
hover: ":hover"
},
normalize: true,
mixins: true,
description: {
en:
"QuarklyPaypalButton — my awesome component",
},
propInfo: {
price: {
title: "Price",
control: "input",
category: "Item"
},
itemName: {
title: "Name",
control: "input",
category: "Item"
},
itemDescription: {
title: "Description",
control: "text-area",
category: "Item"
},
currencyCode: {
title: "Currency code",
control: "input",
category: "Main",
},
clientId: {
title: "Client ID",
control: "input",
category: "Main"
}
}
}, {
price: "1",
currencyCode: "USD",
clientId: "sb",
});

1.3 Create a page with goods#

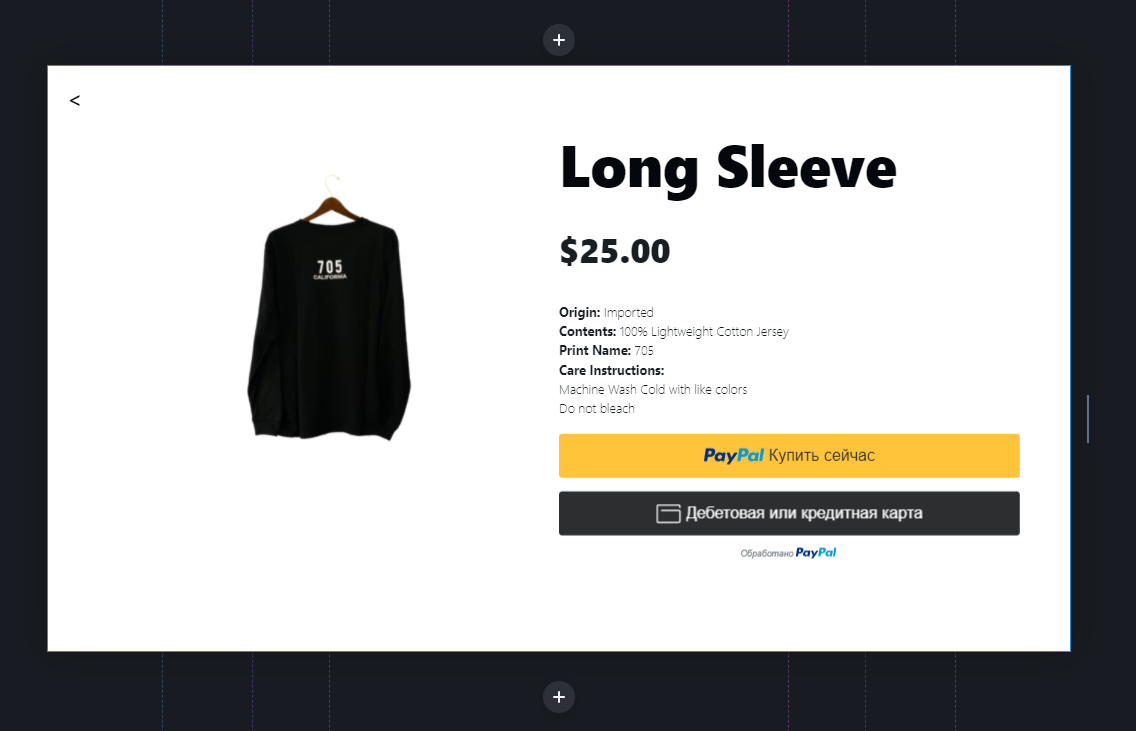
Create a page named Long Sleeve.

<Link
href="/index#"
color="#000000"
position="absolute"
top="25px"
left="25px"
bottom="575.25px"
height="36.75px"
font="--headline3"
text-decoration-line="initial"
hover-color="--primary"
transition="all --transitionDuration-normal ease 0s"
>
&lt;
</Link>
<Section padding="80px 0 80px 0" sm-padding="60px 0 60px 0">
<Override slot="SectionContent" flex-direction="row" md-flex-wrap="wrap" />
<Box
width="50%"
display="flex"
flex-direction="column"
justify-content="space-between"
md-width="100%"
padding="0px 0px 0px 0px"
lg-padding="0px 30px 0px 0px"
md-padding="0px 0px 0px 0px"
md-margin="0px 0px 30px 0px"
>
<Image max-width="340px" src="https://images.unsplash.com/photo-1618354691229-88d47f285158?ixlib=rb-1.2.1&ixid=MnwxMjA3fDB8MHxwaG90by1wYWdlfHx8fGVufDB8fHx8&auto=format&fit=crop&w=715&q=80" md-margin="0px 0px 20px 0px" align-self="center" />
</Box>
<Box
width="50%"
display="flex"
flex-direction="column"
justify-content="space-between"
md-width="100%"
align-self="center"
>
<Text margin="0px 0px 40px 0px" color="--dark" font="--headline1" md-margin="0px 0px 30px 0px">
Long Sleeve
</Text>
<Text margin="0px 0px 40px 0px" color="--darkL2" font="--headline2">
$25.00
</Text>
<Text margin="0px 0px 0px 0px" color="--darkL2" font="--base">
<Strong
overflow-wrap="normal"
word-break="normal"
white-space="normal"
text-indent="0"
text-overflow="clip"
hyphens="manual"
>
Origin:
</Strong>
 Imported
<br />
<Strong
overflow-wrap="normal"
word-break="normal"
white-space="normal"
text-indent="0"
text-overflow="clip"
hyphens="manual"
>
Contents:
</Strong>
 100% Lightweight Cotton Jersey
<br />
<Strong
overflow-wrap="normal"
word-break="normal"
white-space="normal"
text-indent="0"
text-overflow="clip"
hyphens="manual"
>
Print Name:
</Strong>
 705
<br />
<Strong
overflow-wrap="normal"
word-break="normal"
white-space="normal"
text-indent="0"
text-overflow="clip"
hyphens="manual"
>
Care Instructions:
</Strong>
<br />
Machine Wash Cold with like colors
<br />
Do not bleach
</Text>
<Components.QuarklyPayPal
padding="20px 0px 20px 0px"
amount="25"
itemName="Long Sleeve"
itemDescription="Long Sleeve Description"
currencyCode="USD"
/>
</Box>
</Section>

The page should look like this:

Product page

Let's create two copies of the page. Rename one into T-shirt Small Logo, and the other one into T-shirt Big Logo.

Use the page settings to change the URL in the General tab for the following:

  • For T-shirt Small Logo use this t-shirt-small-logo
  • For T-shirt Big Logo use this t-shirt-big-logo

Let’s change the images, names and descriptions of the goods (you can take images for the T-shirt Small Logo and T-shirt Big Logo from the main page)

Besides you should change the props of the QuarklyPayPal component in the right panel.

Specify the price, the name and the description in the Item category.

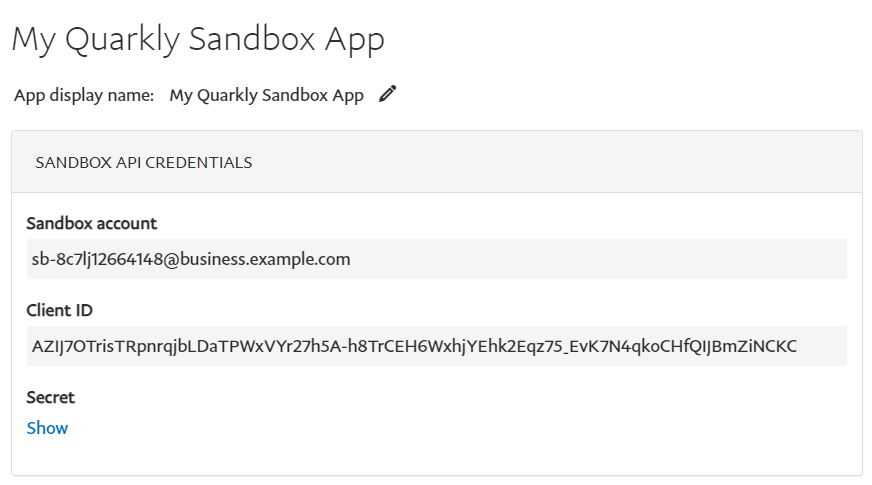
Specify the currency and the Client ID in the Main category.

note

💡 These features should be the same for all the goods

Read the next section to know more about getting the Client ID.

2. Configure the PayPal account (Sandbox)#

Let’s create the Sandbox version of the application. You can test all the payment methods without conducting real payments thanks to this version.

Go to the following page My Apps & Credentials.

My app and credentials

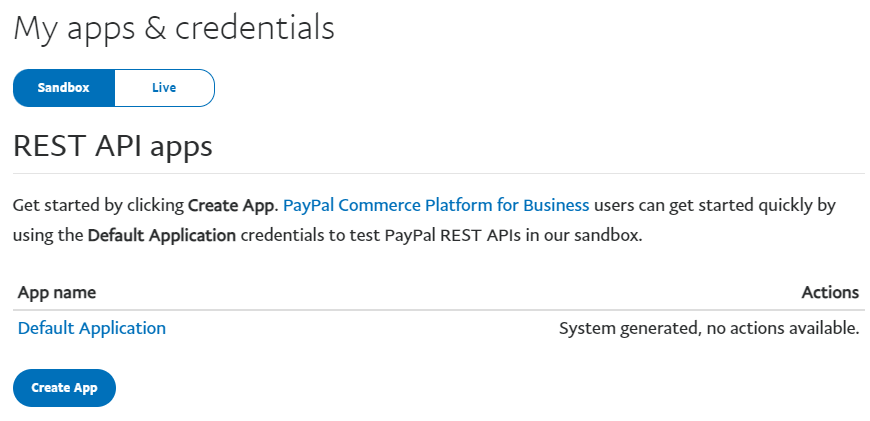
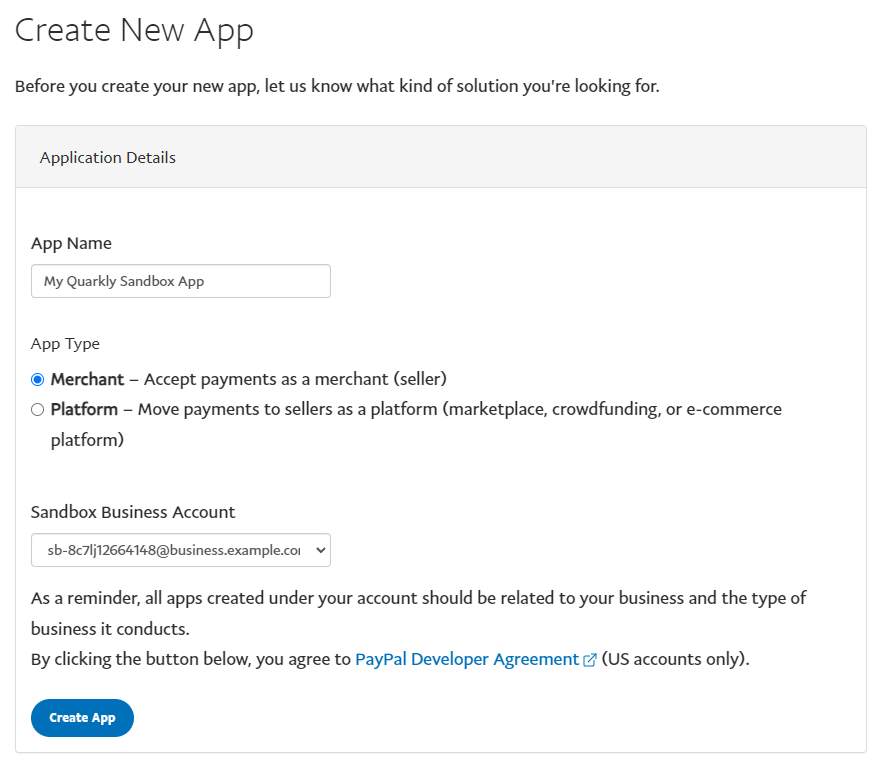
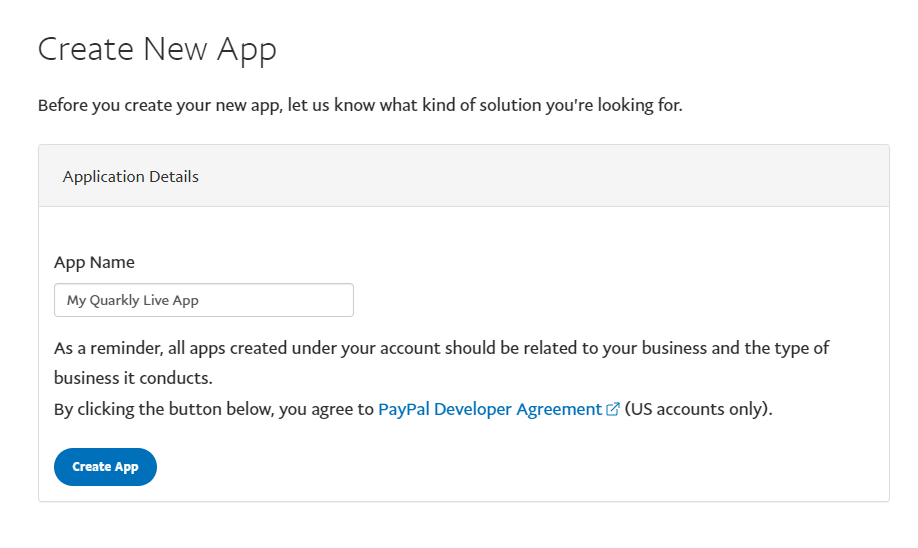
Click Create App. Specify the name of the application and click Create App once again.

Create New App

My Quarkly Sandbox App

3. Check the payment#

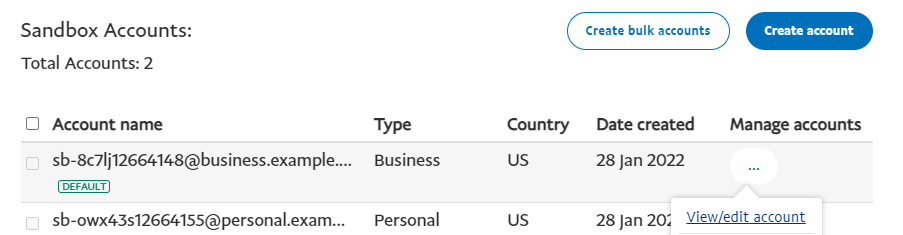
Go to the Sandbox Business Account. You can get the login details in the section Accounts.

Choose the Business type of an account and click View/edit account.

View and Edit Account

note

💡 It would be better to do these actions in a separate browser in the safe mode in order to have an opportunity to check the correctness of the payment functioning on the buyer’s side from your Personal Account.

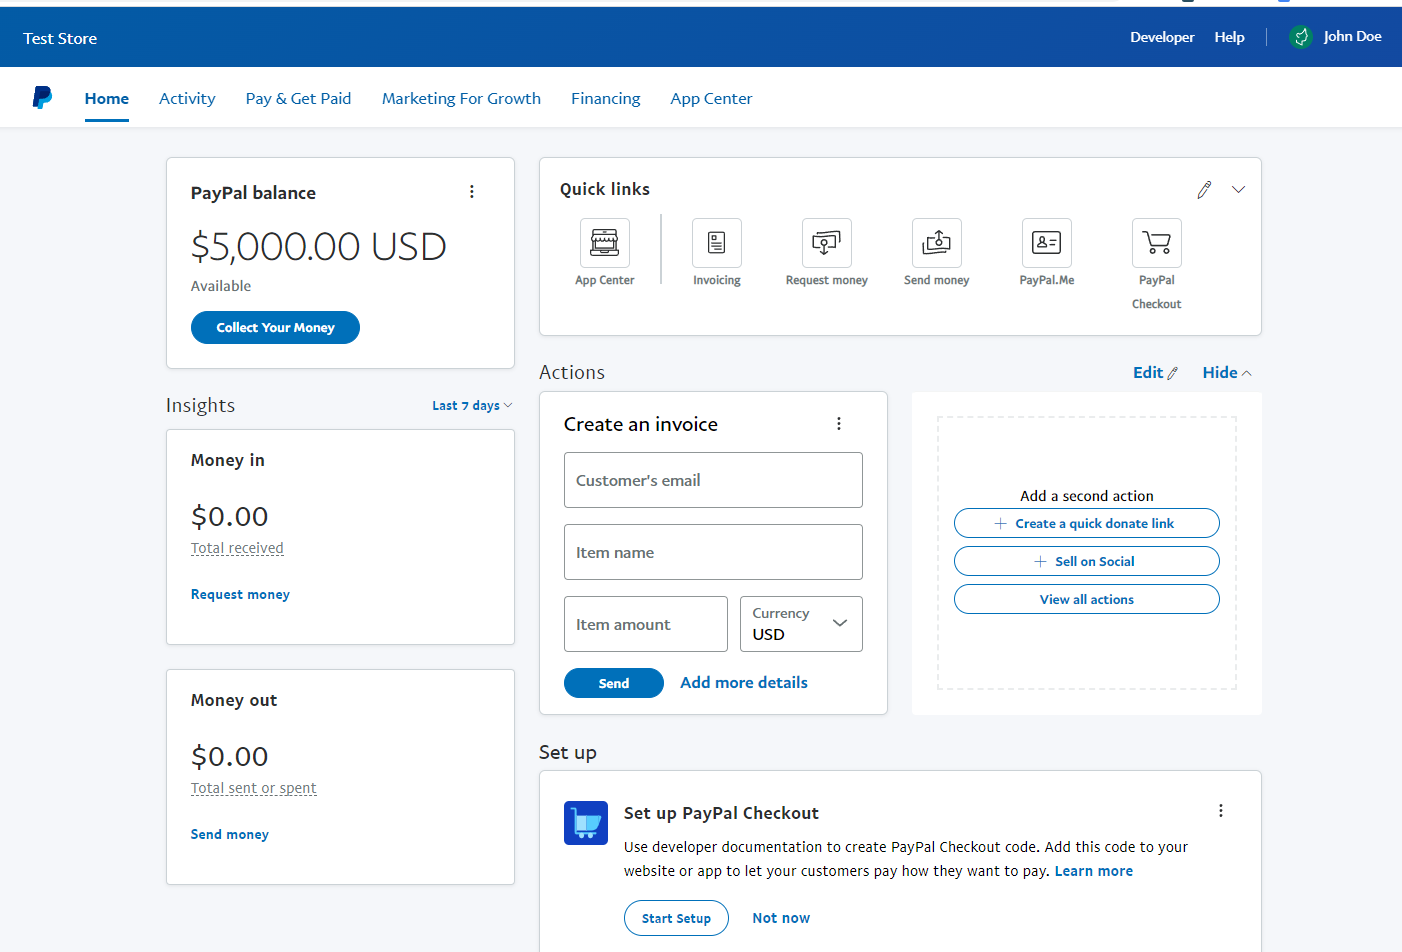
Follow the https://www.sandbox.paypal.com/us/signin and fill in the Email ID and System Generated Password.

After logging in you will see the Main page with a balance of $5,000 US.

Account Dashboard

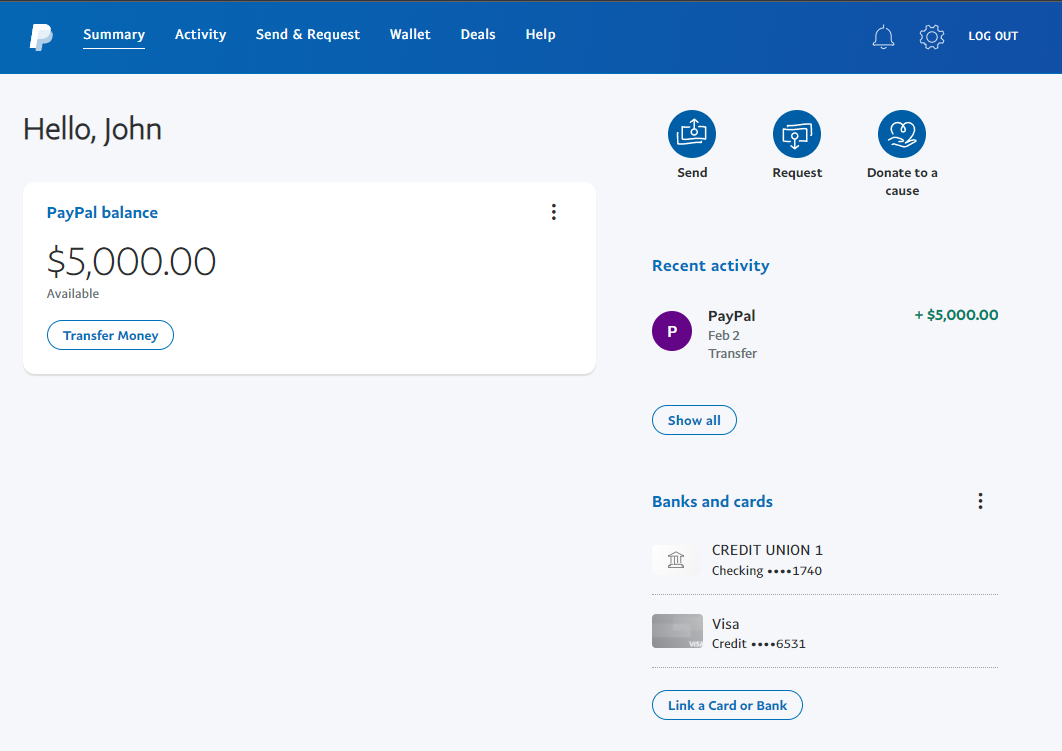
You can do the same with the Personal type of an account.

The interface of the Personal type of an account will be different:
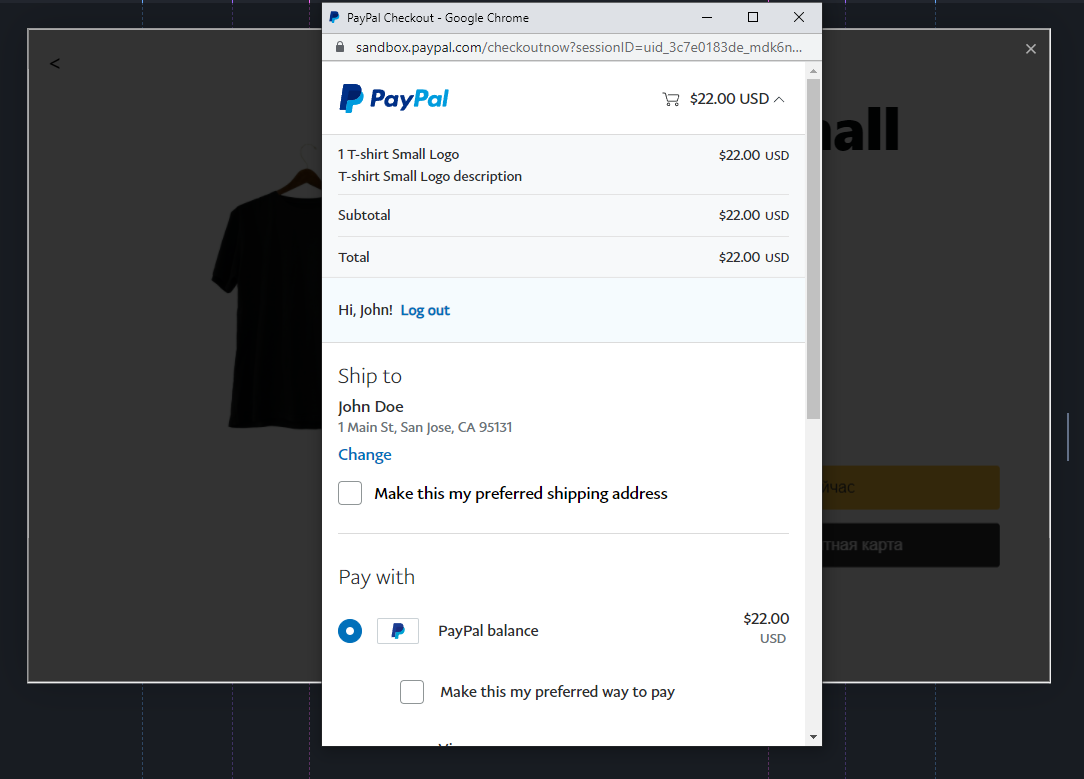
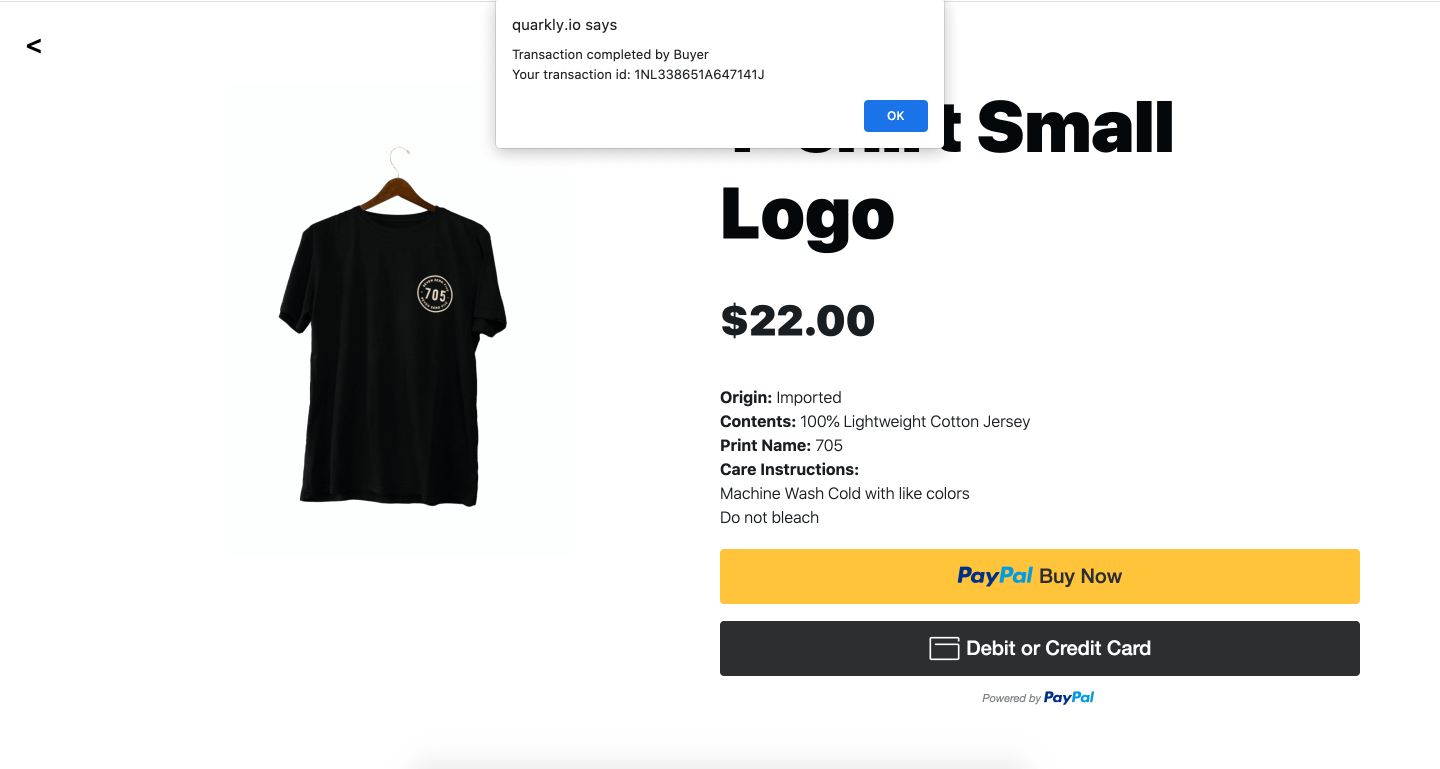
Dashboard Summary

Check the payment:

Checking Payment

Confirm Alert

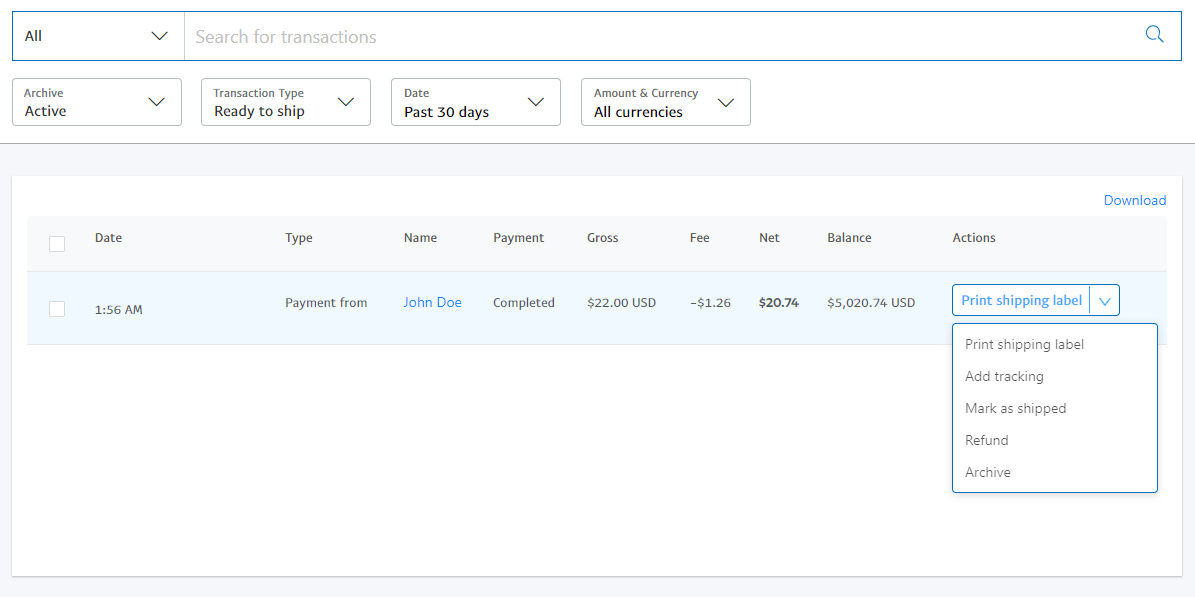
The Business account will look the following way after the payment:

Dashboard After Payment

PayPal Notification

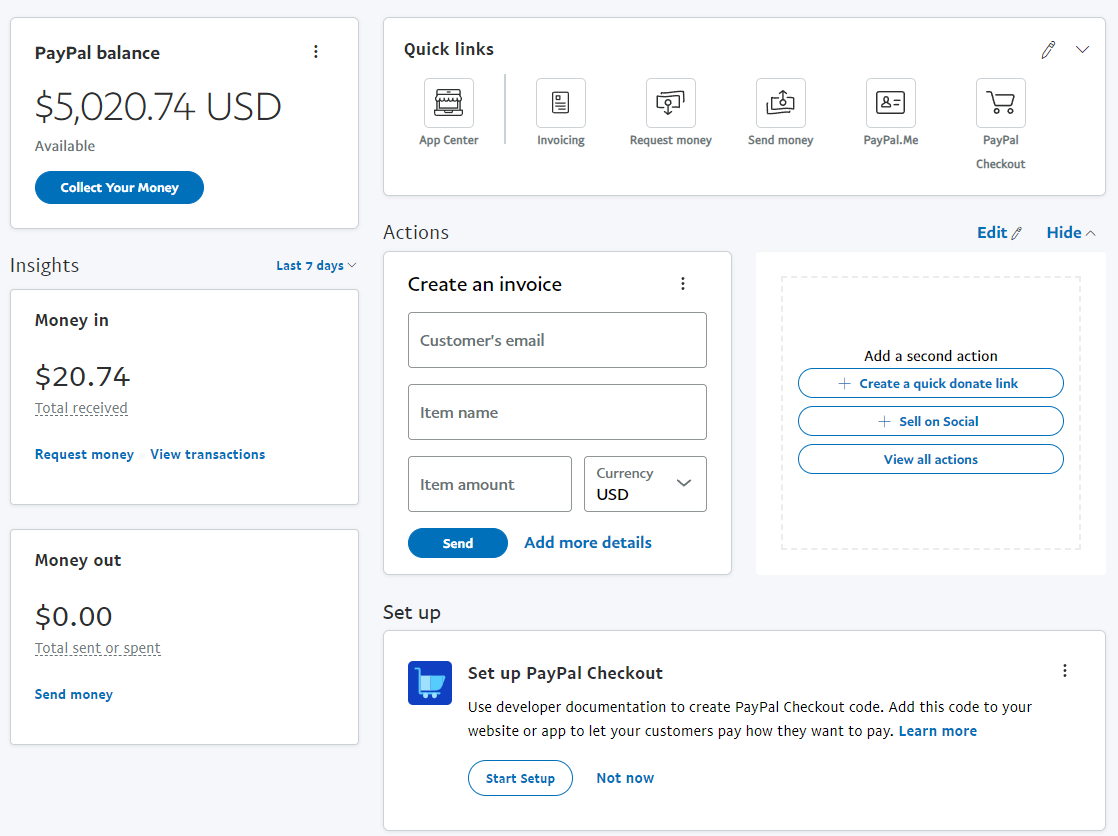
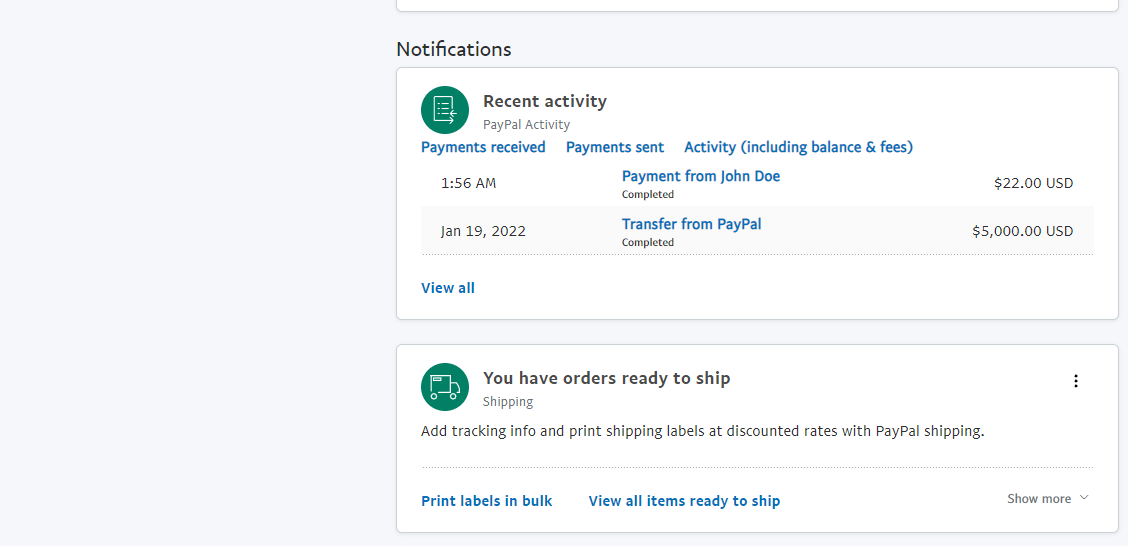
You can check all the orders clicking View all items ready to ship

All Items Ready to Ship

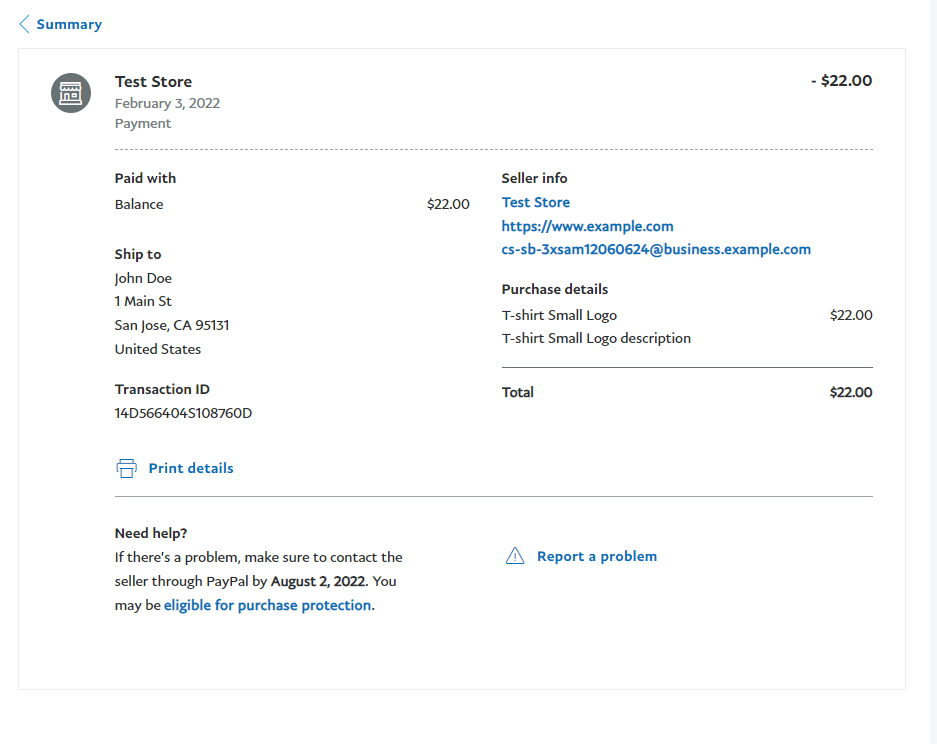
The Personal account page will look the following way:

Personal Account Side

4. Configuring the PayPal account (Live)#

Go to My Apps & Credentials to create the Live (production) version.

Live Mode

Live Mode Create App

Live App API

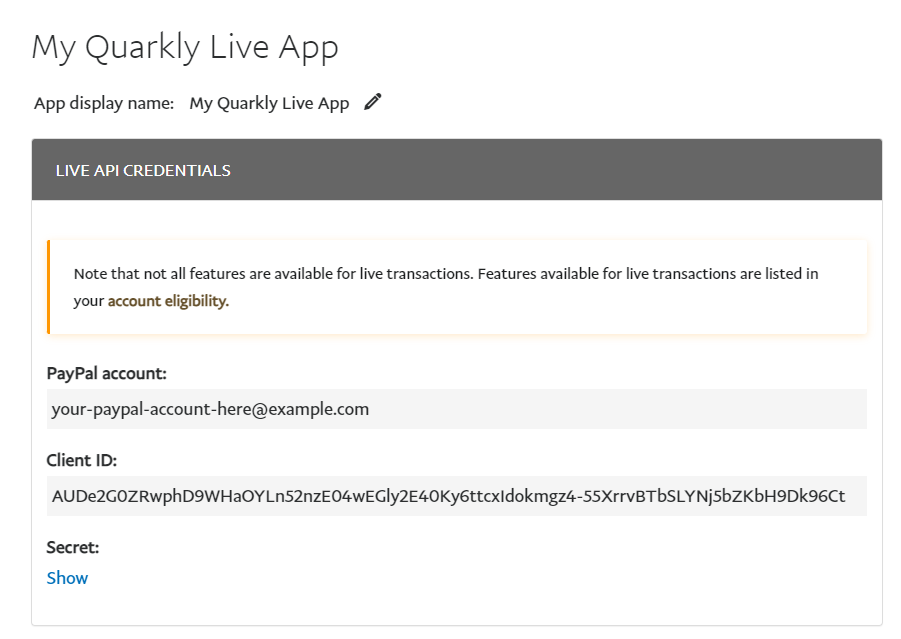
Copy the Client ID and paste it to the props of the QuarklyPaypal component for each of the goods.