Integration with Directual
Let's create a task manager using Directual.
1 Setting up Directual#
1.1 Creating a Directual Project#
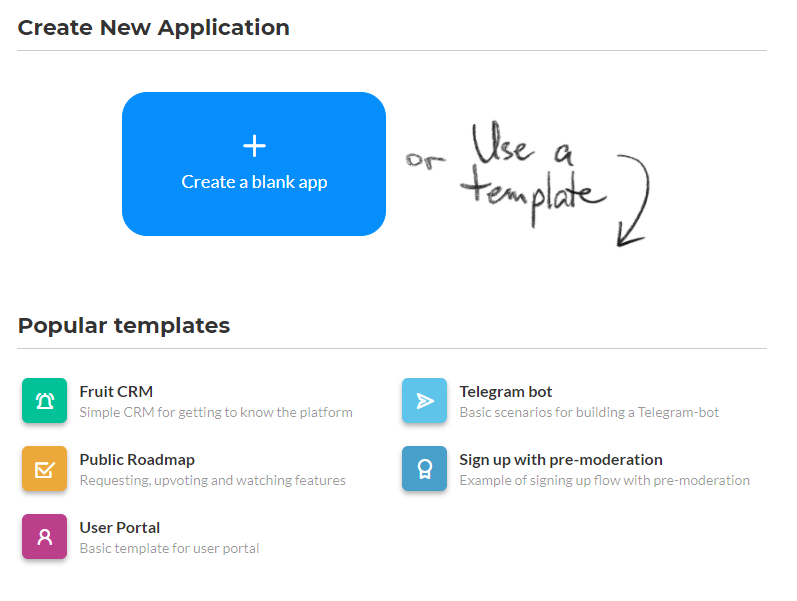
Create a blank app. To do this, click Create a blank app.
If you already have apps, you need to click New app.
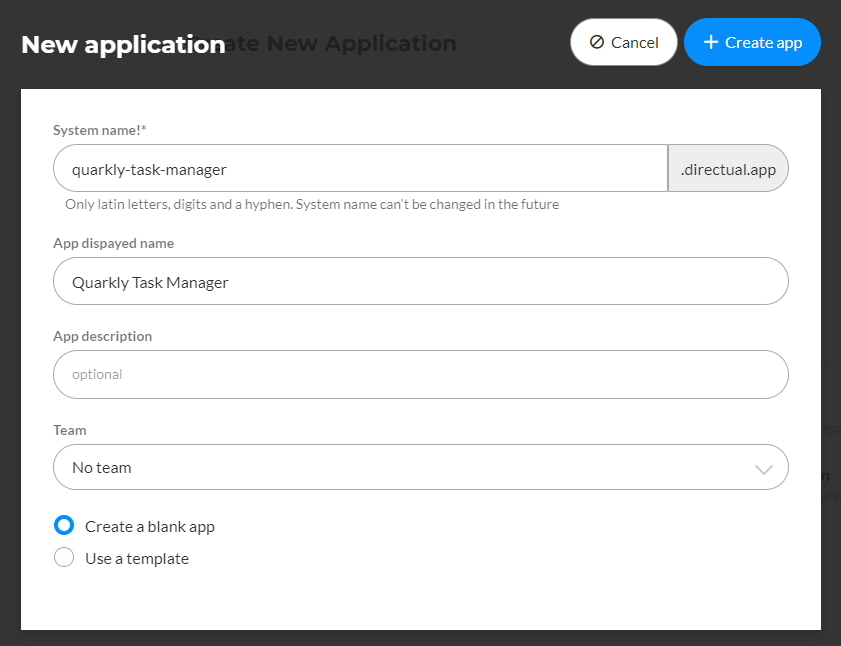
In the window that appears, enter System name, the rest of the fields are optional.
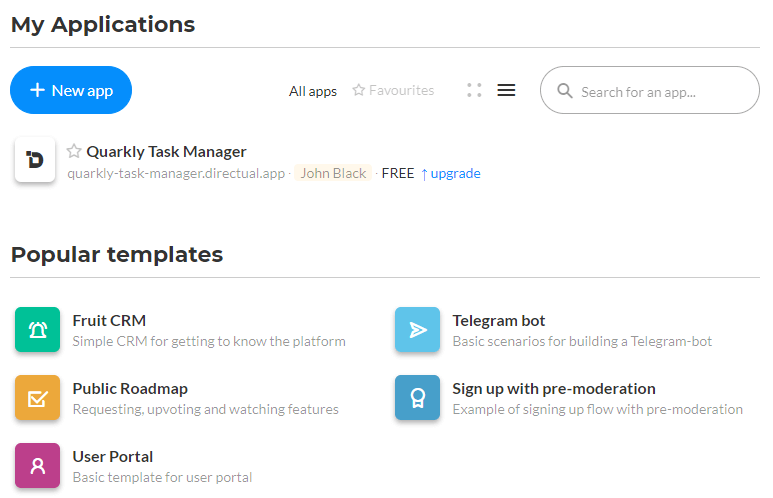
After that, our application will appear in the My Applications list, click on it.
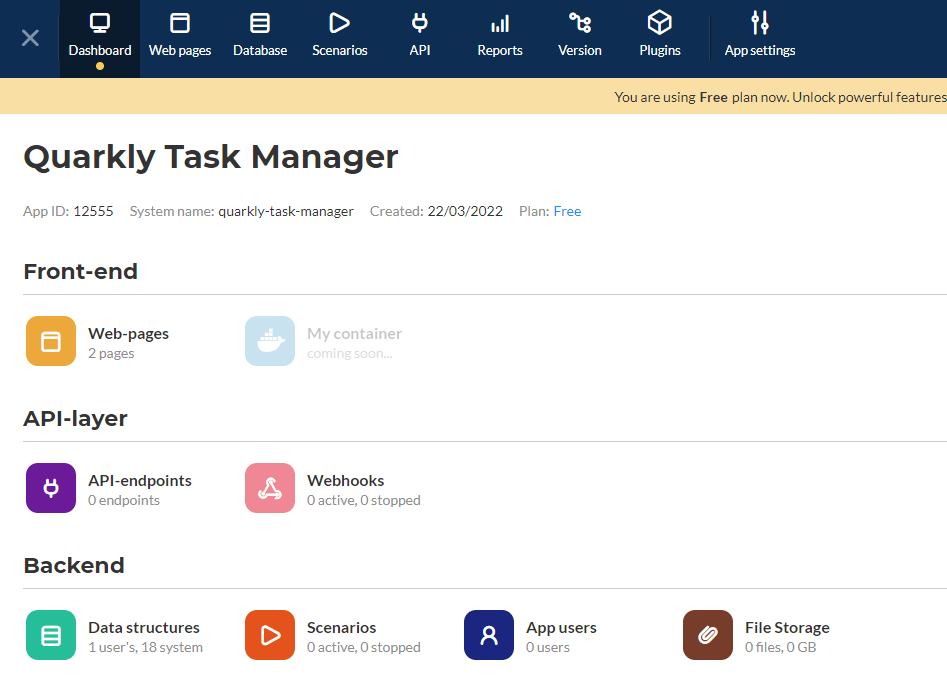
We got into Dashboard.
1.2 Creating structures#
For our application to work, we need to create two Data structures:
- Tasks. This is where user tasks will be stored.
- Register requests. This is where user registration requests will be stored.
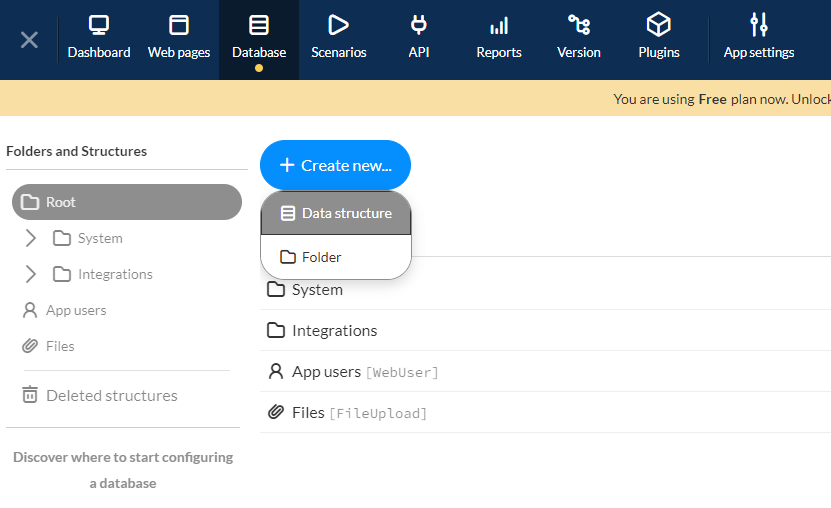
To create a database, go to Database.
To do this, click + Create new... and select Data structure from the drop-down list.
Create a Tasks structure with these parameters:
- Structure name:
Tasks - System name:
tasks

Click Save and go. This will take us to the page with our created structure.
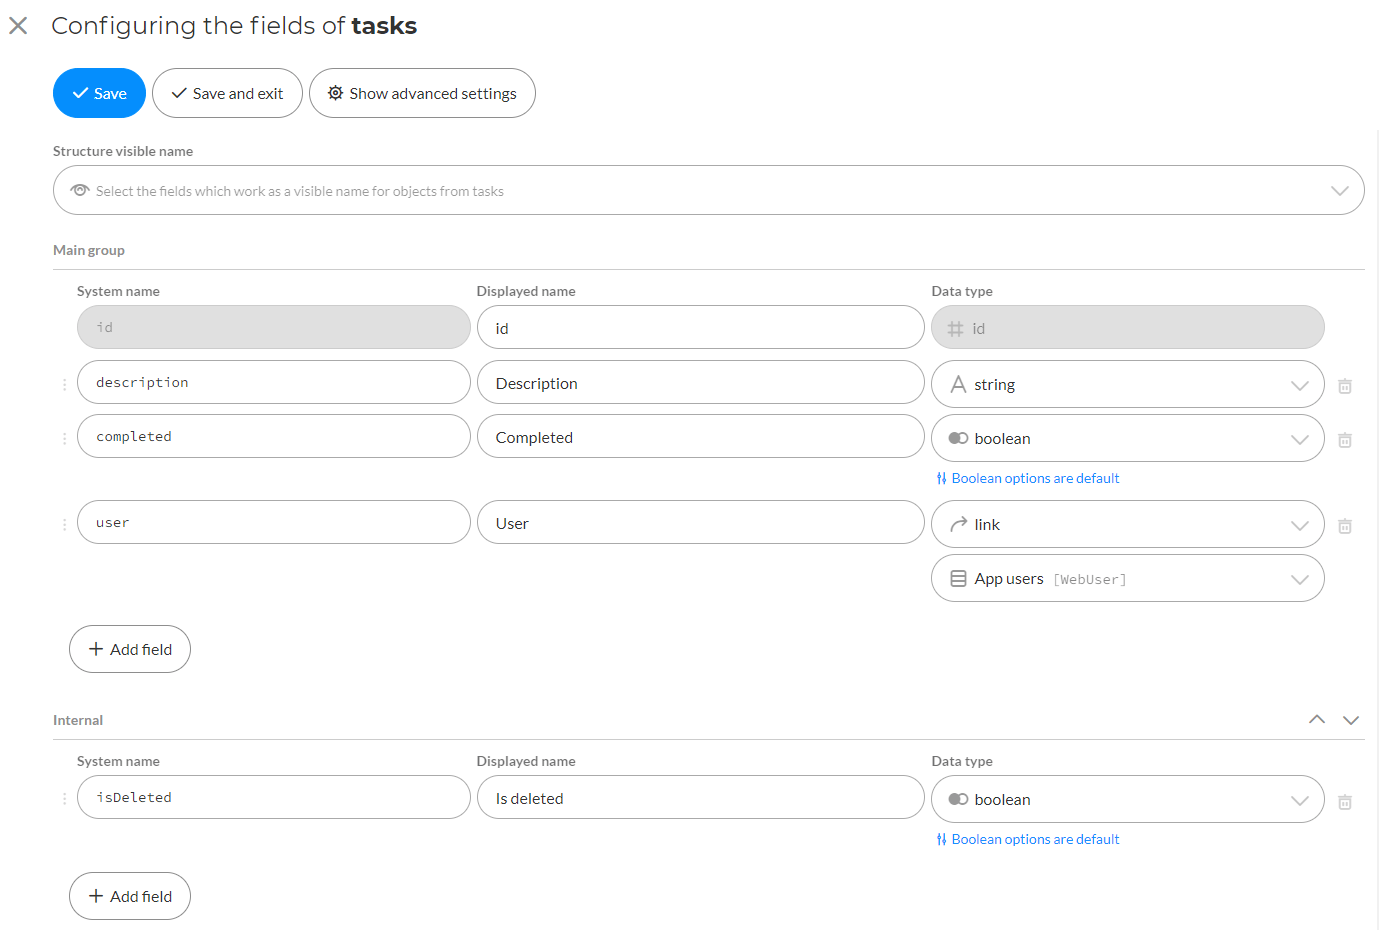
Next, we need to configure the structure fields. To do this press the Configure fields button.
Let's create these fields:
| System name | Display name | Data type |
|---|---|---|
| id | id | id |
| description | Description | string |
| completed | Completed | boolean |
| user | user | link App users [WebUser] |
Add an Internal group, and in it:
| System name | Display name | type |
|---|---|---|
| isDeleted | Is deleted | boolean |
Press Save and exit.
Then press Database to return to the list of structures.
Next, create a Register requests structure with these parameters:
- Structure name:
Register requests - System name:
register_requests
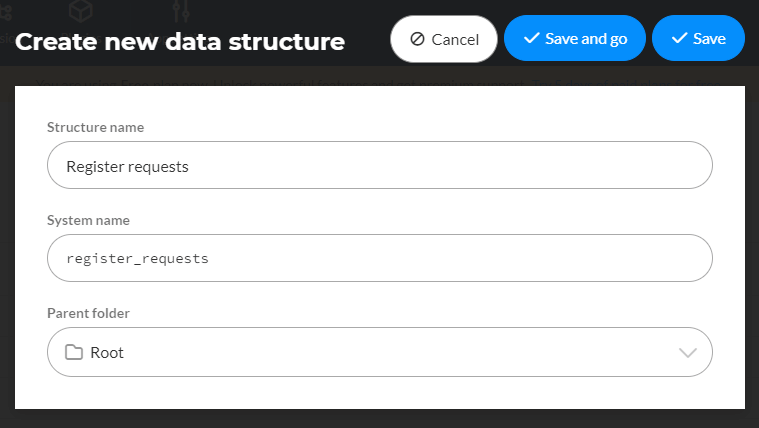
Click Save and go. This will take us to the page with our created structure.
Next we need to configure the fields of the structure. To do this press the Configure fields button.
Let's create these fields:
The Main group
| System name | Display name | Data type |
|---|---|---|
| id | Username (login) | id |
| password | Password | password [string] |
| completed | Completed | boolean |
The Response group
| System name | Display name | Data type |
|---|---|---|
| success | Success | string |
| error | Error | string |
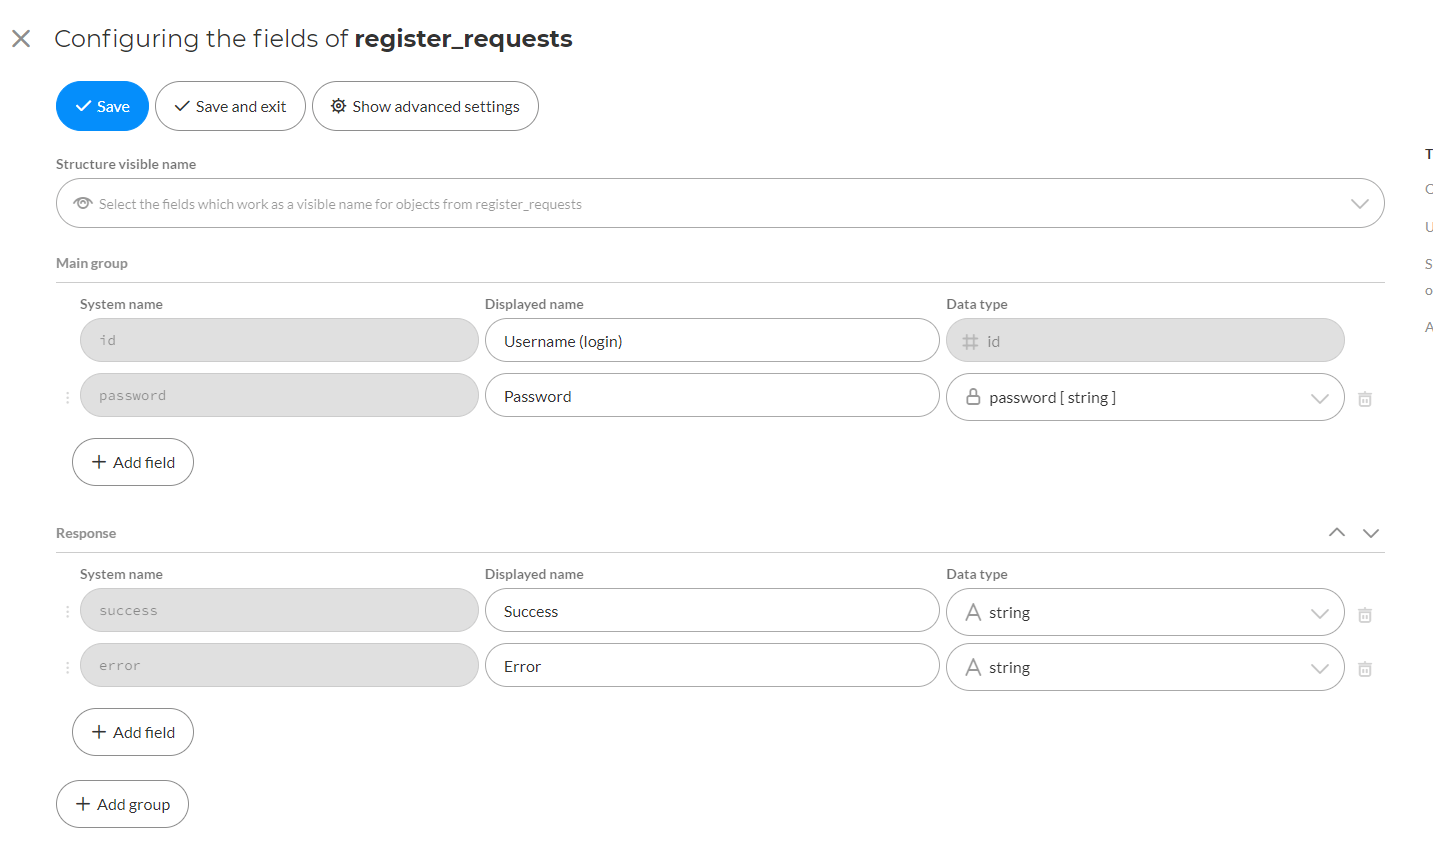
Press Save and exit.
1.3 Creating scenarios#
For our application to work, we need to create two scenarios (https://readme.directual.com/scenarios/principles-of-scenarios):
- Delete task. This is where the task will be deleted.
- Create user. This is where user registration will take place.
To create scenarios, go to Scenarios and click + New scenario.
For the first scenario we specify the following parameters:
- Scenario name:
Delete task - Target data structure:
Tasks [tasks] - Run scenario by:
Real-time: Changed objects - Trigger by fields
Is deleted
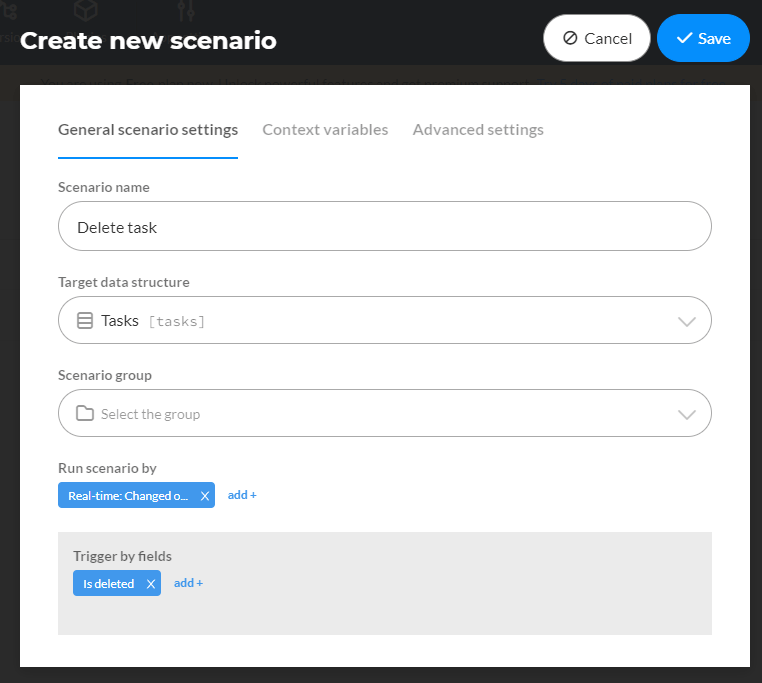
Then click Save.
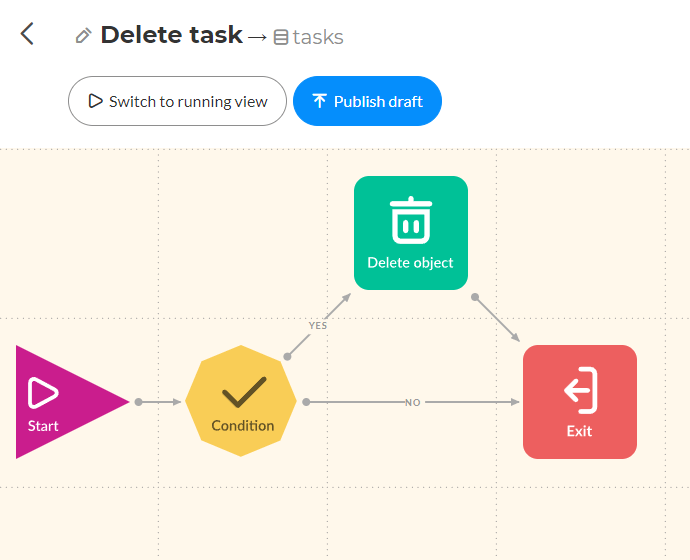
Our new scenario now appears in the list. Click on it to edit it.

The Delete task scenario will work like this:
- If Is deleted field is true, we delete our object.
- Else we don't do anything.
This is how it is implemented in Directual:
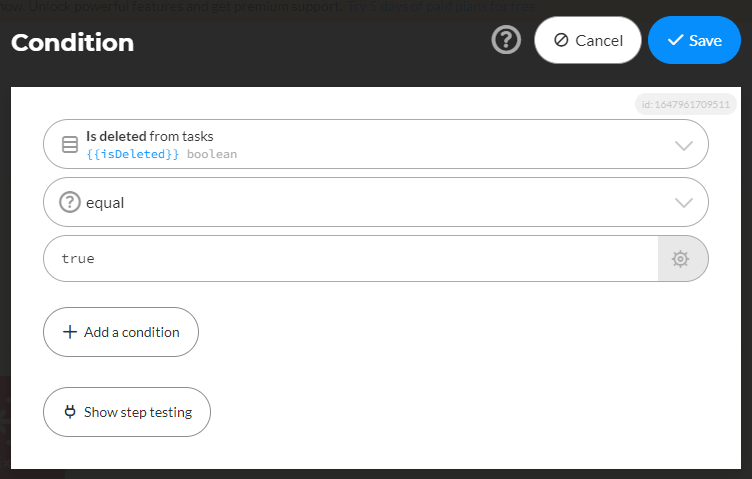
In the Condition block set
- Is deleted
- equal
- true.
Then click Save.
Press Publish draft.

And then Run scenario.

After performing these steps, our scenario will be launched (indicated by the green triangle next to the name).

Back to the list of scenarios.
Press + New scenario to create a second scenario**.
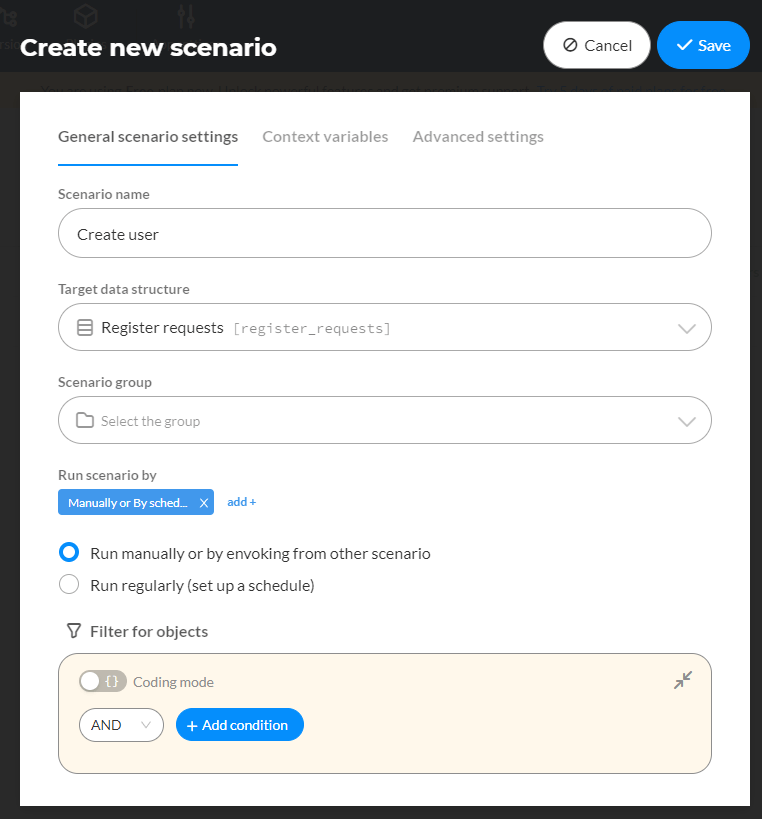
Specify these parameters:
- Scenario name:
Create user - Target data structure:
Register requests [register_requests] - Run scenario by:
Manually or By schedule
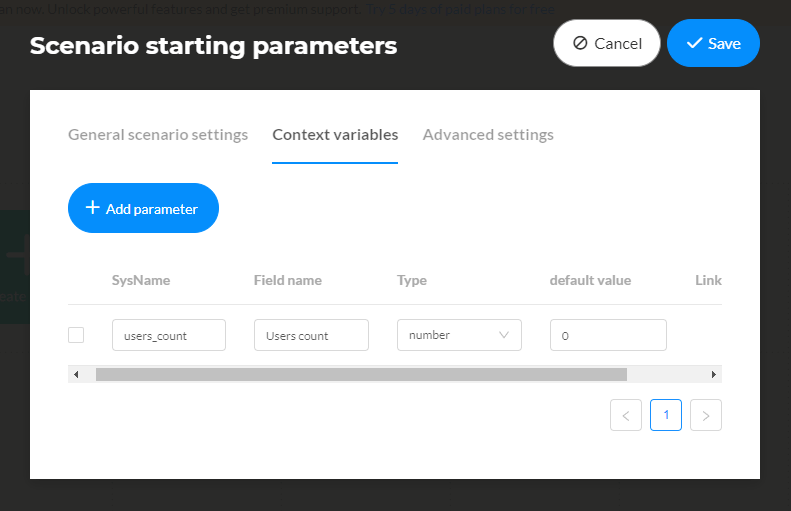
In the Context variables tab add this parameter:
| SysName | Field name | Type | default value |
|---|---|---|---|
| users_count | Users count | number | 0 |
Then click Save.
Our new scenario now appears in the list. Click on it to edit it.

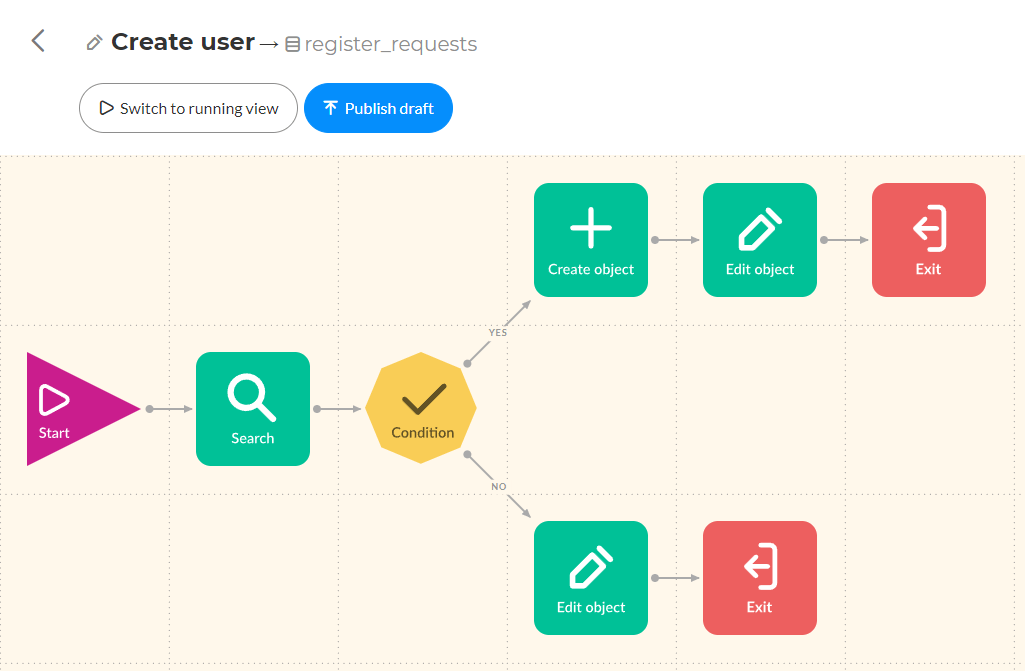
The Create user script will work like this:
- Count the number of users with the login from the request (register request);
- If the number of users is 0 (there is no user with such login), then create and return the answer;
- Else an error is returned.
This is how it is implemented in Directual:
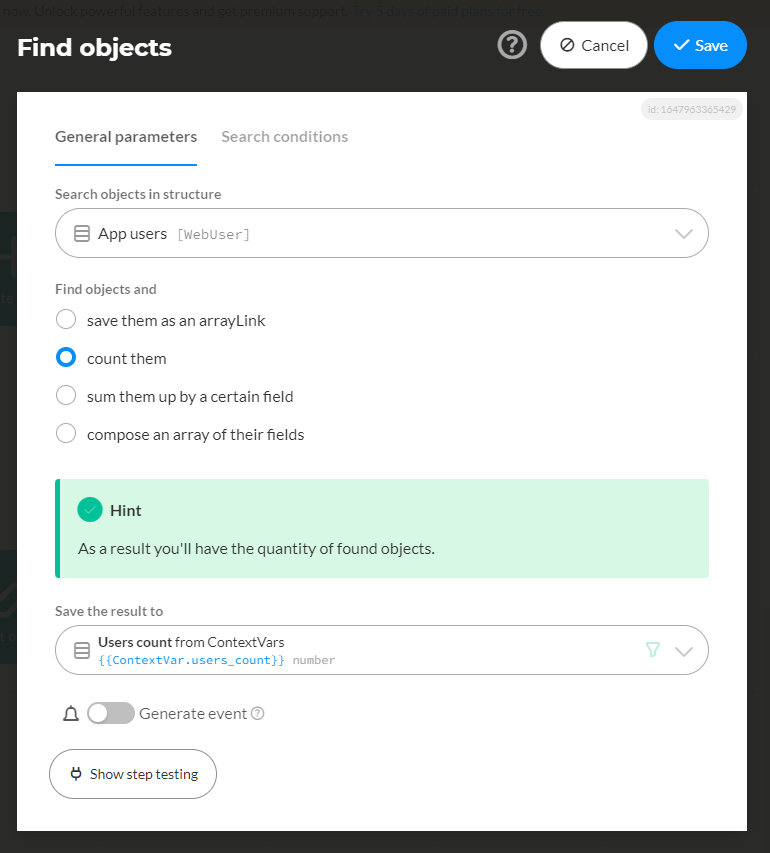
In the Search block we specify the following parameters:
- Search objects in structure:
App users [WebUser] - Find objects and
count them - Save the result to
Users count from ContextVars
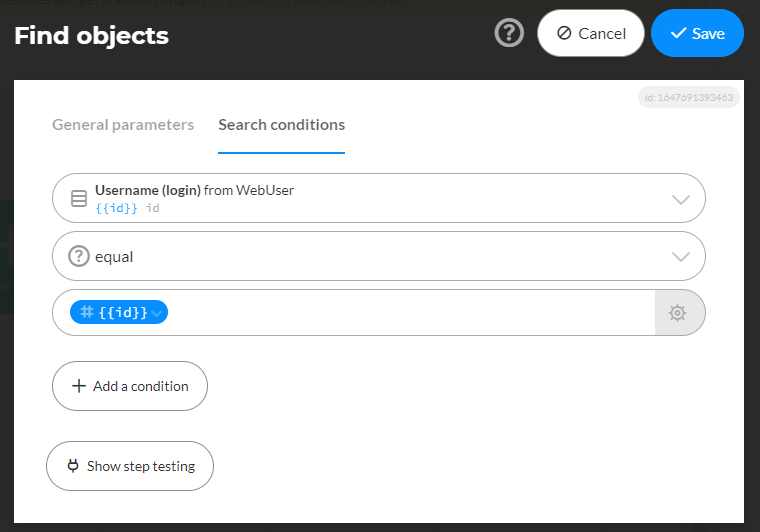
In the Search conditions tab we specify:
Username (login) from WebUserequal#{{id}}
Then click Save.
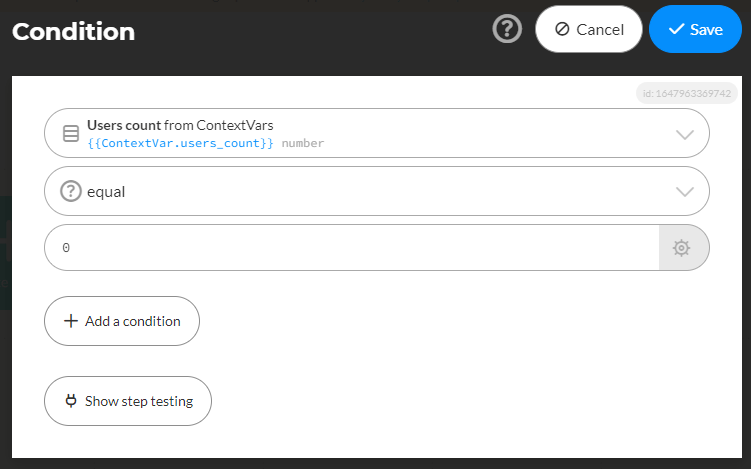
In the Condition block we specify:
Users count from ContextVarsequal0
Then click Save.
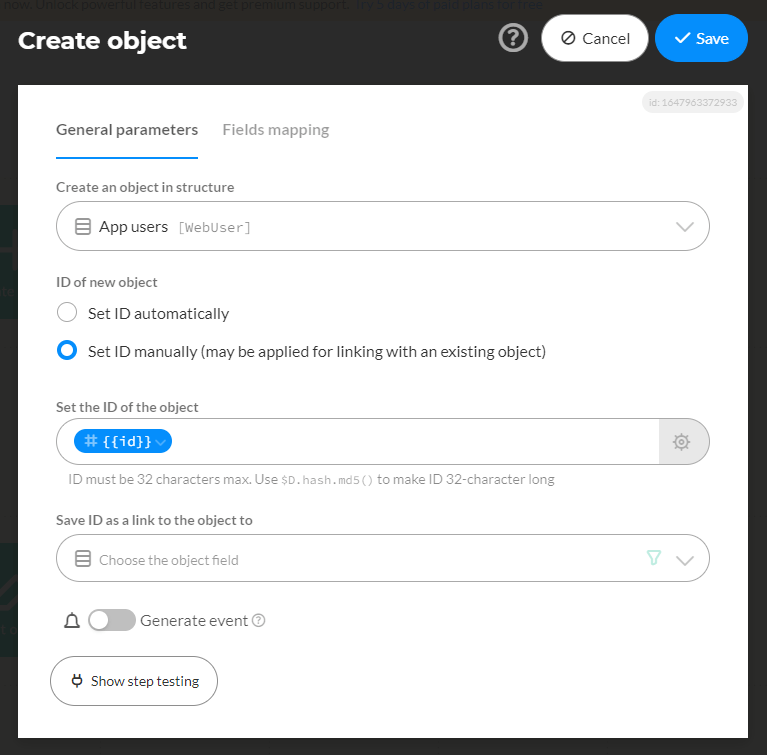
In the Create object block we specify:
- Create an object in structure
App users [WebUser] - ID of new object
Set ID manually - Set the ID of the object
#{{id}}
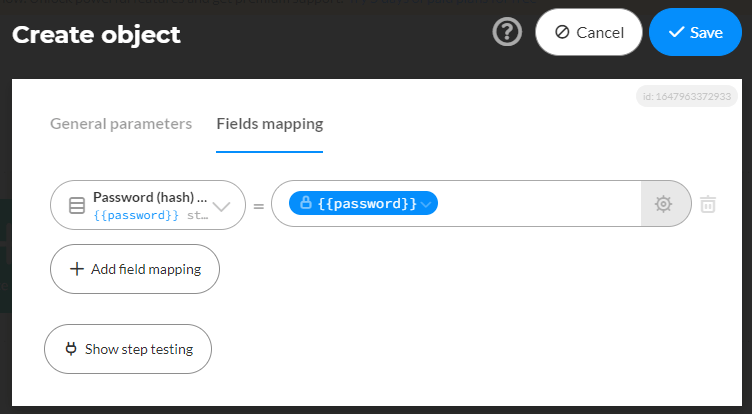
In the Fields mapping tab we specify:
- Password (hash):
{{password}
Then click Save.
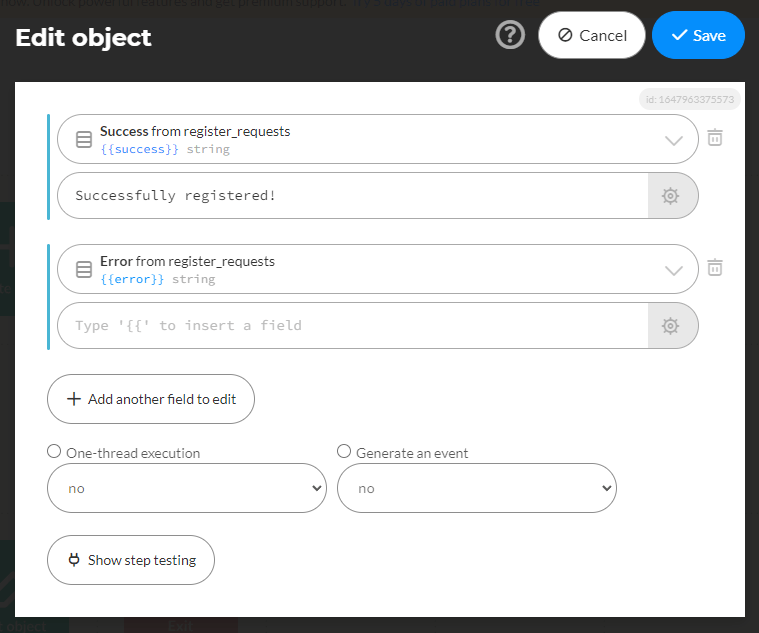
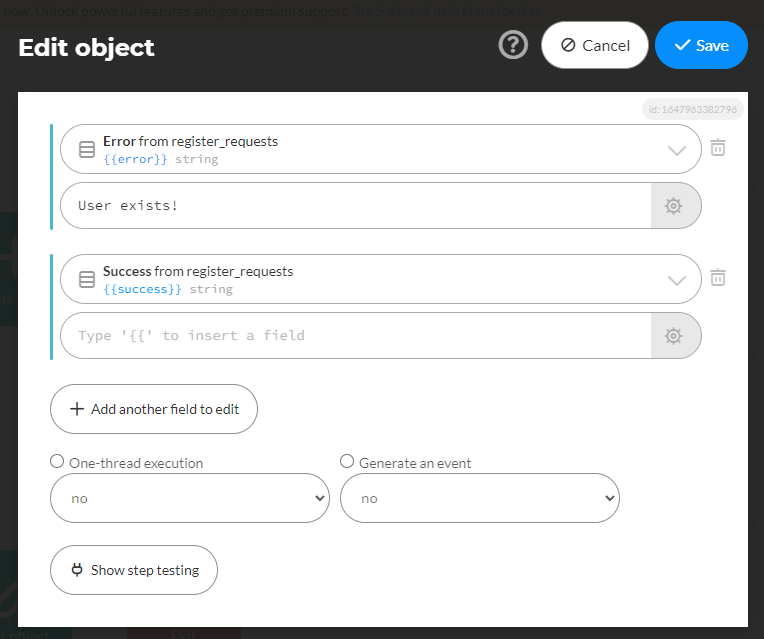
In the Edit object block that follows Create object in the Yes branch, specify:
- Success from register_requests:
Successfully registered! - Error from register_requests:
Leave empty
Then click Save.
In the Edit object block, which is in the No branch, specify:
- Error from register_requests:
User exists! - Success from register_requests:
Leave empty
Then click Save.
Press Publish draft and Run scenario.

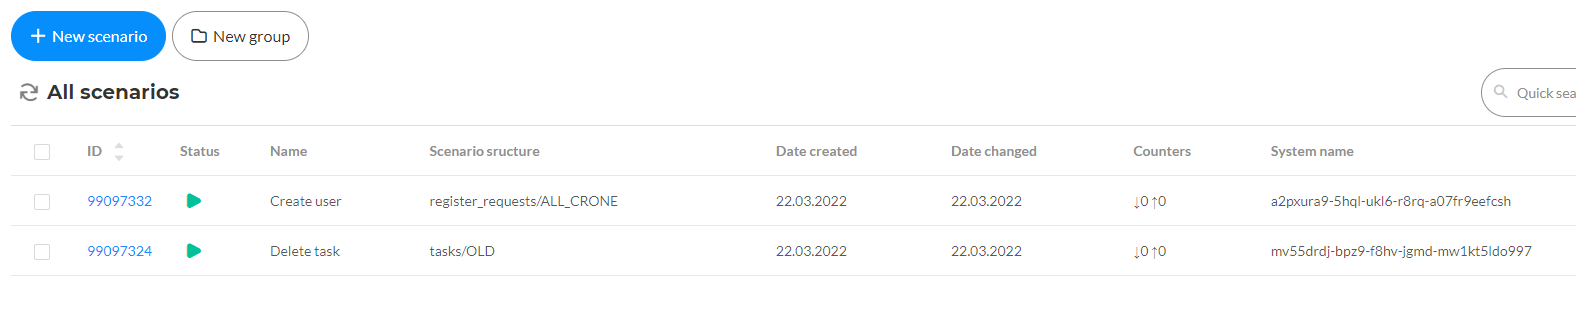
There will now be two running scripts in the list.
1.4 Creating API-Endpoints#
For Directual to work with Quarkly, you need to create several API-Endpoints:
- tasks/tasks - for creating, editing and deleting tasks
- register_requests/create_user - to register a user
To create API-Endpoints, go to the API section.
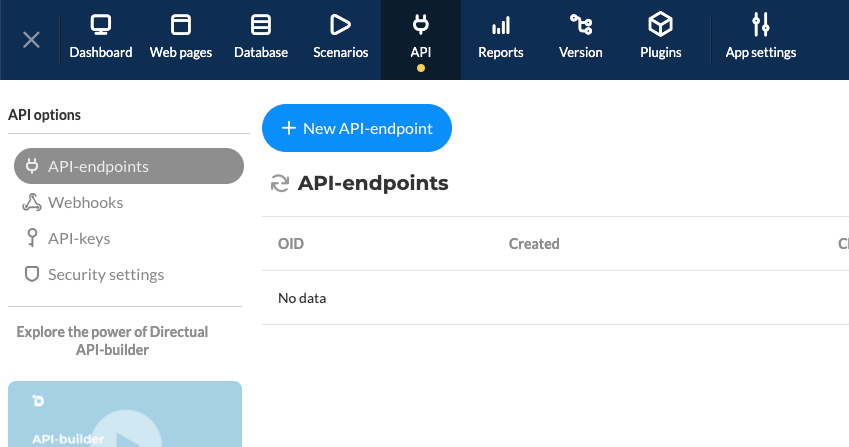
Press + New API-endpoint.
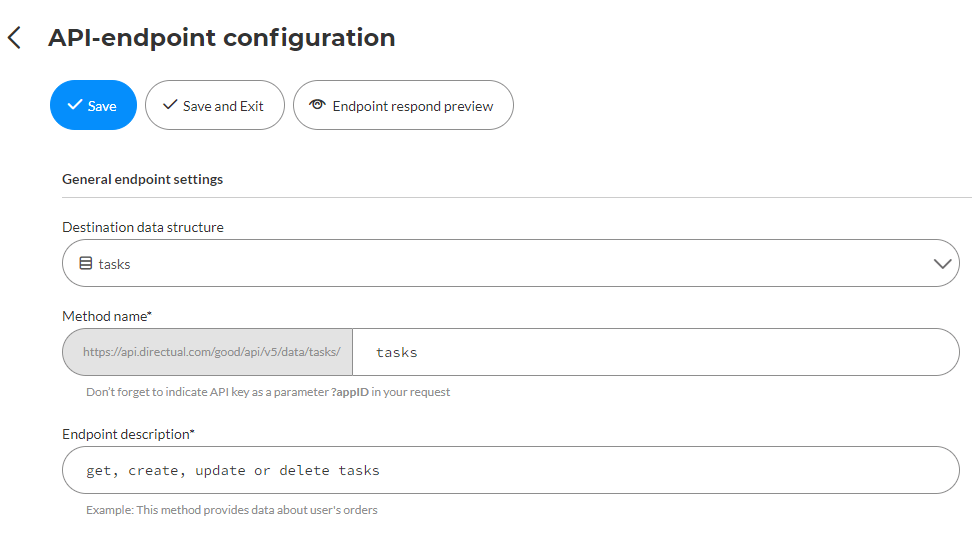
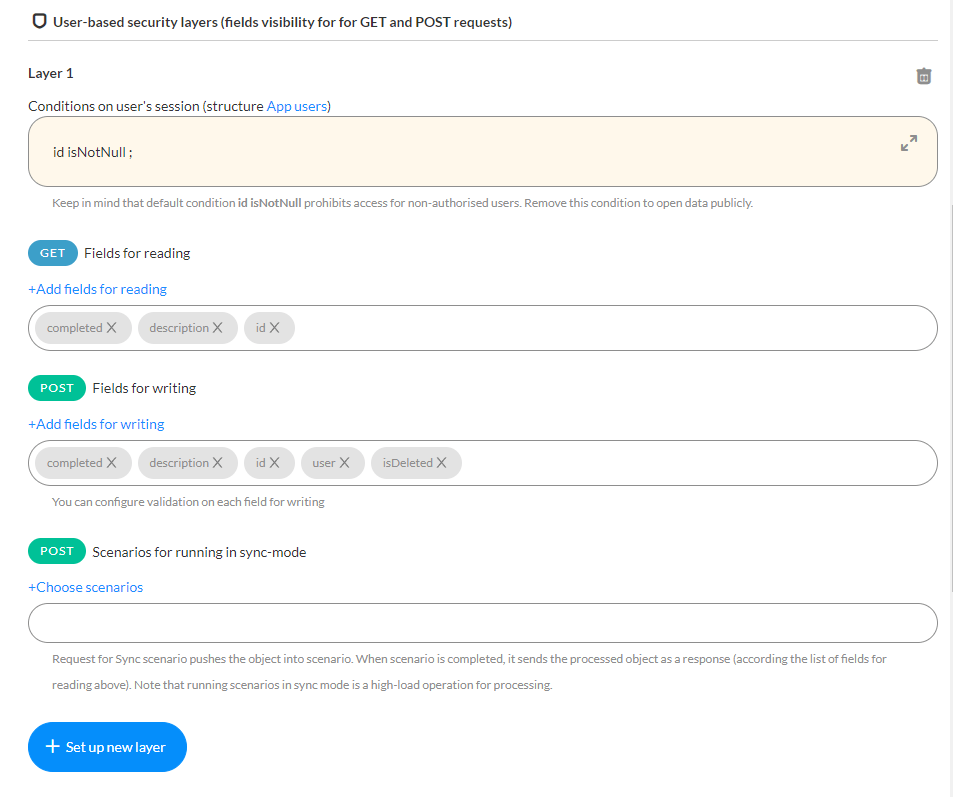
For the endpoint tasks/tasks we use the following parameters:
- Conditions on user’s session (structure App users):
id isNotNull; - GET:
completed, description, id - POST:
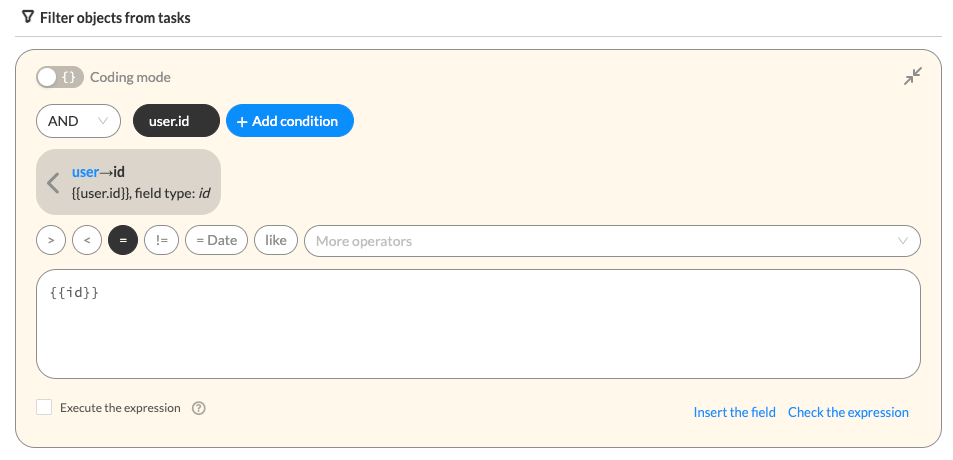
completed, description, id, user, isDeleted - Filter object from tasks:
user.id == {{id}} - Enable cors:
true
Then click Save and exit.

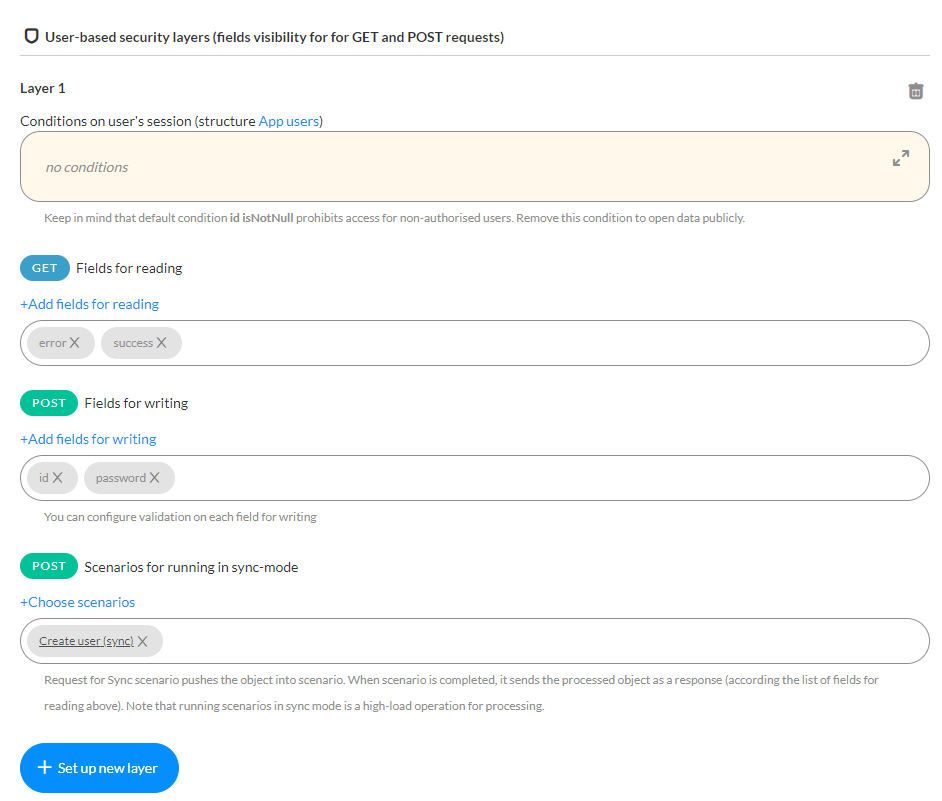
For the endpoint register_requests/create_user we use these parameters:
- Conditions on user’s session (structure App users):
no conditions - GET:
error, success - POST:
id, password - Filter object from tasks:
no conditions - Enable cors:
true
Then click Save and exit.


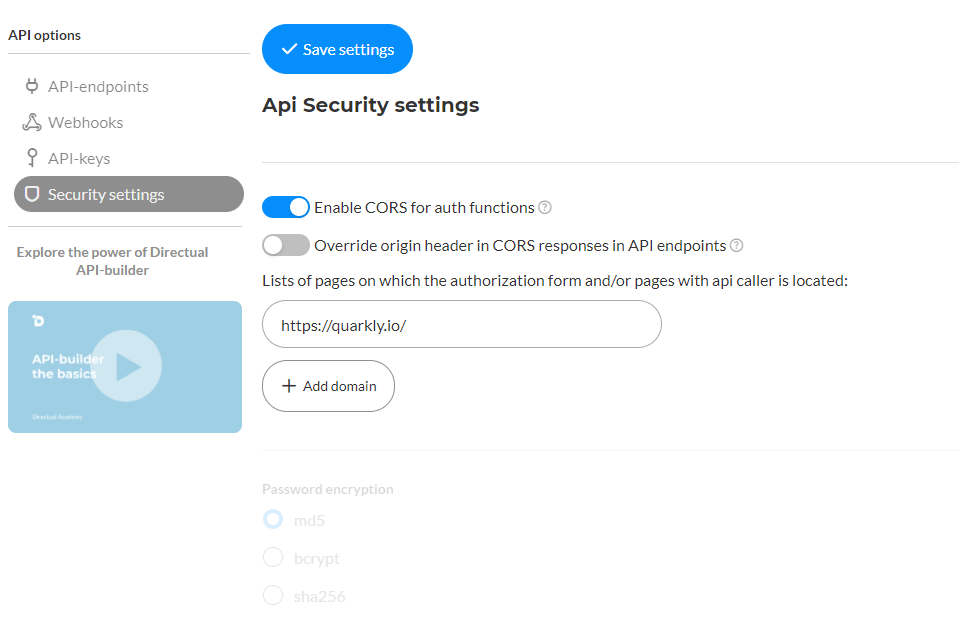
1.5 Configuring security settings for the API#
In the API section, go to the Security settings tab.
Turn on CORS for authorization functions, and add domains to the list:
https://quarkly.io/Your domain on which the published application will run.
Then click Save settings.
2 Setting up a Quarkly project#
Create an empty project in Quarkly.
2.1 DirectualClient component (module)#
Create a DirectualClient component. This will be the module with our Directual project's parameters. It will export the useTasks hook to work with the task list and useAuth hook to work with authorization.
The swr library is used to sample the data.
Copy the code below and paste it into our component.
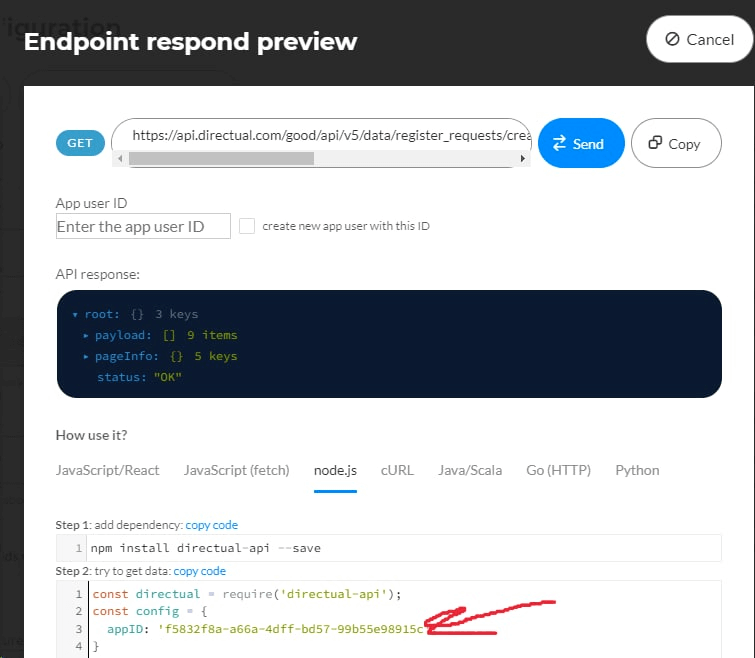
You must also replace <YOUR_APP_ID> with your application id. This can be obtained in the Endpoint respond preview in any of the endpoints.
2.2 App component#
Create an App component. The App component is the wrapper for our entire application. Here, we will call hooks from the Directual client and pass their results through React Context.
Copy the code below and paste it into our component.
2.3 Input, Checkbox, and Form components from the Marketplace#
You will need several components from the catalog to make our application work:
- Input
- Checkbox
- Form
Find them in the components catalog and add them to the project.
2.4 LoginForm component#
Create a LoginForm component. It will be the login form.
Copy the code below and paste it into our component.
2.5 The ButtonWithIcon component#
Create a ButtonWithIcon component. It will be a button with an icon.
Copy the code below and paste it into our component.
2.6 Task component#
Create Task component. This will be a component for displaying a single task.
Copy the code below and paste it into our component.
2.7 Tasks component#
Create a component called Tasks. This will be a list of tasks.
Copy the code below and paste it into our component.
2.8 AddTask component#
Create a component called AddTask. This will be a component for adding new tasks.
Copy the code below and paste it into our component.
2.9 Setting up the home page#
Copy the code below and paste it into our page.
After that the index page will look like this:
